
Desserts
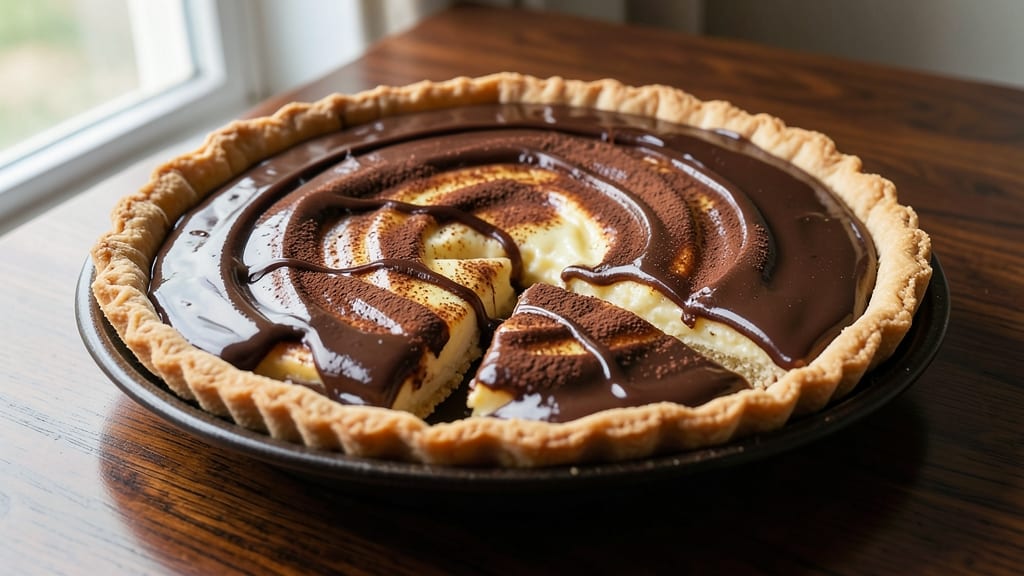
A Boston cream pie chocolate glaze transforms this classic dessert into something truly extraordinary. This silky ganache, infused with subtle coffee notes, creates a glossy, velvety finish that enhances every bite. The combination of dark chocolate, butter, and cream delivers a rich, balanced flavor that complements the custard filling perfectly.
What sets this glaze apart is its smooth texture and easy application—no tempering or complicated techniques required. By melting chocolate with heavy cream and butter, then whisking until perfectly glossy, you’ll achieve a finish that’s both professional and foolproof.
The coffee infusion adds depth without overpowering the chocolate’s natural richness.
This glaze isn’t just for Boston cream pie—it elevates cakes, cupcakes, and even ice cream with its luxurious sheen. Once cooled to the right consistency, it drizzles effortlessly, creating an elegant, restaurant-quality finish. The result is a dessert that looks as impressive as it tastes.
Ready in just 15 minutes, this glaze requires minimal effort but delivers maximum impact. Whether you’re baking for a special occasion or simply indulging in a classic dessert, this recipe ensures every bite is unforgettable. Let’s get started!
Ingredients for boston cream pie chocolate glaze
Seven ingredients create this luxurious chocolate glaze with coffee depth and velvety texture.
| Ingredient | Amount | Notes |
|---|---|---|
| Dark Chocolate Chips 🍫 | 8 oz | High-quality, 60-70% cocoa |
| Heavy Whipping Cream 🥛 | 1 cup | Full-fat for best gloss |
| Unsalted Butter 🧈 | 4 oz | Cold, cut into small cubes |
| Instant Espresso Powder ☕ | 1 tsp | For coffee infusion |
| Vanilla Extract 🌿 | ½ tsp | Pure Madagascar preferred |
| Granulated Sugar 🍚 | 1 tbsp | Balances bitterness |
| Kosher Salt 🧂 | ¼ tsp | Fine grain preferred |
The chocolate makes or breaks this glaze. Ghirardelli or Lindt squares melt beautifully, but Ghirardelli chips. Skip the pre-shredded stuff—it's full of anti-caking agents. For the butter, Plugrá or Land O'Lakes work perfectly, but avoid salted. The instant espresso? Starbucks or Nescafé is what I grab at the store—it dissolves cleanly without graininess. Pro tip: toast your espresso powder in a dry pan for 30 seconds to deepen the flavor.
No instant espresso? Cold brew concentrate at half the amount works in a pinch, but it might add bitterness. Short on vanilla? Almond extract at a quarter teaspoon mimics the warmth. The sugar is non-negotiable—it's what prevents the glaze from seizing. If you're using a different cocoa percentage chocolate, adjust the sugar to taste. For a smoother finish, strain the melted mixture through a fine-mesh sieve before using. And trust me, the butter cubes need to stay cold—they temper the chocolate beautifully as they melt.
This glaze sets at room temperature but stays workable for about 30 minutes. Store leftovers in an airtight container between uses, separated by parchment paper. It reheats beautifully—just microwave 20 seconds, stir, and it's ready to drizzle again. For a restaurant-quality finish, chill the glaze for 10 minutes before drizzling—it'll hold its shape perfectly. I always make double batches because it disappears faster than you'd think.
Why You'll Love This Recipe
- No-Fuss Magic: I swear by this glaze—just melt chocolate with butter, fold in cream, and a pinch of espresso powder transforms it. No tempering, no fuss, just rich, velvety perfection every single time.
- Espresso Kiss: That little scoop of instant espresso powder? It’s the secret weapon—deepens the chocolate’s bite while keeping it smooth. Honestly, it’s like a grown-up version of dessert, and my coffee-loving husband won’t stop raving.
- Double Duty: Use it to drizzle over store-bought Boston cream pie for a restaurant-worthy upgrade, or dip pound cake squares for a no-bake treat. I’ve even turned it into a quick ice cream topping when I’m lazy—versatility at its finest.
- Pantry Goldmine: You’re already using ingredients you own: dark chocolate, butter, cream. The espresso powder is the only splurge, but it stretches to make multiple glaze batches. Leftovers? Freeze them—thaw and reheat for a last-minute dessert fix.
Step-by-step instructions for silky chocolate ganache with coffee infusion
This rich, velvety glaze transforms ordinary Boston cream pie into a decadent masterpiece with layers of coffee depth.
Heat the Whipping Cream and Coffee Essence
In a medium saucepan, combine the 1 cup heavy whipping cream, 1 tsp instant espresso powder, and 1 tbsp granulated sugar. Bring to a gentle simmer over medium heat, stirring constantly with a wooden spoon to dissolve the sugar completely. The mixture should reach 185°F—this is crucial for proper chocolate melting and glossy finish.
Here's the thing—don't let it boil. You're looking for tiny bubbles breaking the surface and a temperature reading of 185°F on your thermometer. If you boil it, you'll end up with a grainy ganache. Remove from heat immediately once you hit that temperature, then let it steep for 5 minutes to infuse the coffee flavor deeply.
Melt the Chocolate and Butter
While the cream steeps, place the 8 oz dark chocolate chips and 4 oz unsalted butter (cut into small cubes) in a heatproof bowl. Set this bowl over a pot of barely simmering water, ensuring the bottom doesn't touch the water. This indirect heat method creates a silky texture without seizing the chocolate.
Stir gently with a silicone spatula until the chocolate and butter melt completely, forming a smooth, glossy mixture. You'll know it's ready when the chocolate has fully dissolved and the mixture looks like liquid velvet. Remove from heat immediately—any further cooking will cause the chocolate to darken and lose its delicate flavor.
Combine and Temper for Perfect Texture
Carefully pour the hot coffee-infused cream through a fine-mesh strainer into the melted chocolate mixture. Add the 0.5 tsp vanilla extract and 0.25 tsp kosher salt, then whisk vigorously until completely smooth. This is where the magic happens—the heat from the cream gently cooks the chocolate, creating that signature ganache texture.
Let the mixture rest for 10 minutes at room temperature. You'll notice it thicken dramatically as it cools. This resting period is non-negotiable—it allows the ganache to develop its proper consistency. If it thickens too much, simply reheat gently (don't boil) and whisk until smooth again. The final texture should be thick but pourable, like warm honey.
Adjust Consistency for Pouring Perfection
If the ganache is too thick to pour smoothly, thin it with 1-2 teaspoons of hot heavy whipping cream at a time until it reaches a pourable but thick consistency—it should coat the back of a spoon but still flow freely. For the Boston cream pie, you want it thick enough to cling beautifully to the cake layers without sliding off.
Here's my pro tip: Test the consistency by dipping a spoon into the ganache and lifting it. If it forms a smooth, glossy ribbon that breaks cleanly, it's ready. If it's too thin, it won't create those dramatic, glossy peaks we want on the pie. The perfect ganache should hold its shape when poured but still flow gracefully over the cake's surface.
Pro Tips For Making Boston Cream Pie Chocolate Glaze
- Temper the Chocolate: Chop the dark chocolate chips into uneven pieces first—this speeds up melting and prevents clumping. I learned this the hard way when my glaze turned into a lumpy mess because I just dumped them in whole.
- Whisk, Don’t Stir: Use a wire whisk to combine the melted chocolate and cream—it incorporates air and silkiness. Stirring with a spoon leaves streaks, and your glaze will look (and taste) uneven.
- Espresso First, Then Cream: Mix the instant espresso powder into the cream before heating it—this dissolves it completely and avoids gritty bits. I used to add it after, and the texture always suffered.
- Cool Before Vanilla: Let the glaze cool to 110°F (43°C) before adding vanilla—hot liquid kills its flavor. Add it too early, and you’ll taste nothing but butter and chocolate.
Make-ahead tips for this recipe
Prep Ahead Essentials
Make this glaze 24 hours ahead—it actually tastes better after resting! Store it in an airtight container at room temperature, separated by parchment paper to prevent sticking. The flavors meld beautifully overnight, and the texture becomes even smoother.
I usually make it the night before so it's ready to drizzle the next day without any last-minute stress. 💫
Freezing for Later Use
For long-term storage, freeze the glaze in 1-ounce portions using silicone molds or ice cube trays. Once frozen solid, transfer to a freezer bag and store for up to 3 months.
To use, thaw in the refrigerator overnight, then reheat gently in 10-second bursts in the microwave, stirring between each interval. This method preserves the glaze's silky texture perfectly.
Make-Ahead Boston Cream Pie
Assemble the entire pie 1 day ahead—bake the cake, prepare the custard filling, and even assemble the layers. Store it uncovered at room temperature in an airtight container. Just before serving, warm the glaze slightly (if needed) and drizzle it over the pie.
The contrast of warm glaze over chilled custard is pure magic. This approach ensures you're not rushed on serving day.
Glaze Consistency Tips
If making the glaze ahead, adjust its consistency by adding 1 teaspoon of hot cream at a time if it thickens too much in storage. Conversely, if it becomes too thin, chill it for 10 minutes to help it regain its proper thickness.
I always test the consistency by spooning a small amount onto a plate—it should hold its shape but still flow when tilted slightly.
Equipment Prep
Gather your tools the night before to streamline the process. You'll need a fine-mesh strainer, whisk, and offset spatula for drizzling. I also recommend having a kitchen scale on hand to measure chocolate precisely—this makes all the difference in achieving a professional finish.
Pre-measuring all ingredients the day before saves time and reduces stress during the actual cooking process.
Serving Temperature
Serve the pie at room temperature for the best experience. If you've stored it in the refrigerator, let it sit for 30 minutes before serving to allow the custard to soften slightly. This also helps the glaze drizzle more smoothly.
For a showstopping presentation, chill the glaze for 10 minutes before drizzling—it'll create those gorgeous, glossy peaks that make the pie look like it came from a bakery. 🌟
Nutrition facts
Frequently asked questions
Can I substitute regular chocolate for dark chocolate in this glaze?
Regular milk chocolate works, but you’ll lose the deep, rich flavor and glossy finish this recipe delivers. Dark chocolate (60-70% cocoa) provides the perfect balance of bitterness and sweetness, plus a smoother texture. If you must use milk chocolate, reduce the sugar to ½ tablespoon since it’s already sweeter.
Why did my glaze turn grainy?
Graininess usually happens from one of three things: boiling the cream (temperature exceeded 185°F), not straining the mixture, or adding cold ingredients too quickly. Always strain the glaze through a fine-mesh sieve and ensure the cream reaches 185°F without boiling. If it’s already grainy, whisk in 1 teaspoon of hot cream to smooth it out.
How do I fix a glaze that’s too thick or too thin?
For a thick glaze, gently reheat it in 10-second microwave bursts, stirring between each interval, until it reaches a pourable consistency. If it’s too thin, chill it for 10-15 minutes to help it thicken naturally. The ideal texture should coat the back of a spoon but still flow smoothly when drizzled.
Can I make this glaze without coffee?
Skip the espresso powder and add an extra ½ teaspoon of vanilla extract for depth. The glaze will still be rich and delicious—just without the coffee notes. For a different twist, try ½ teaspoon of orange zest or a pinch of cinnamon instead.
How long will the glaze keep in the fridge?
Store the glaze in an airtight container in the fridge for up to 5 days. Before using, let it sit at room temperature for 10-15 minutes to soften. If it thickens too much, reheat gently and whisk until smooth. For longer storage, freeze it in 1-ounce portions for up to 3 months.