
Desserts
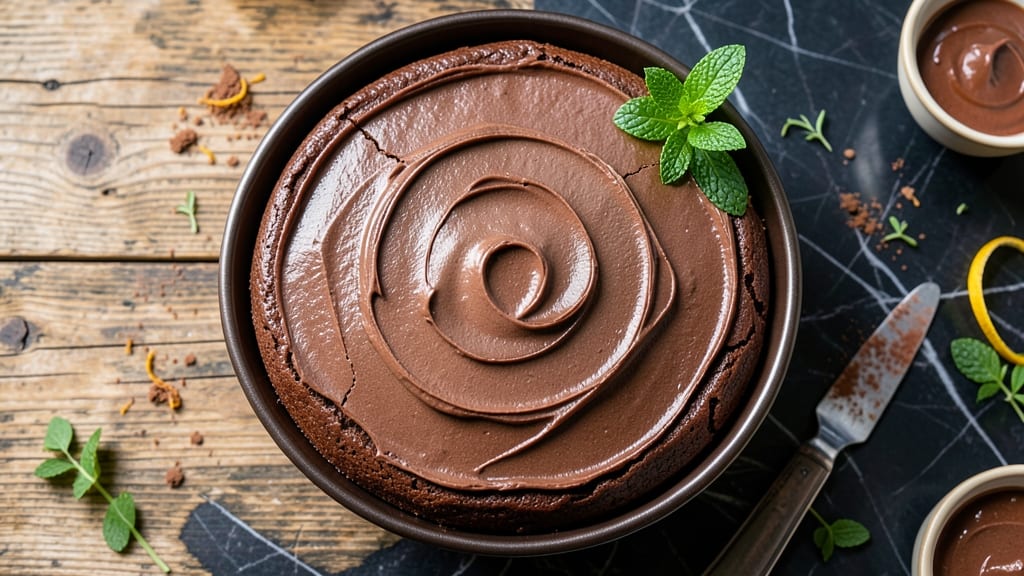
Winning a blue ribbon chocolate cake isn't about luck—it's about locking in moisture so every slice stays tender for days. This recipe delivers that signature competition-worthy texture: a rich, fudgy crumb with just the right crumb, and a velvety buttercream that melts into each layer.
The secret? A precise balance of cocoa powder, buttermilk, and a reverse-creaming method that prevents dryness, even when sliced the next day.
Professional bakers know the difference between good chocolate cake and award-winning cake comes down to technique. We start with a single bowl mix that develops deep flavor through slow saturation, then bake at a precise temperature to ensure even rising.
The cooling process is just as critical—resting the cake in its pan for 10 minutes before transferring prevents cracking, while the buttercream is tempered to room temperature for perfect pipeability.
What makes this recipe truly special is how it maintains its moisture even after slicing. The buttercream isn't just decoration—it's a moisture barrier that keeps each slice soft and decadent hours after baking.
Whether you're entering a fair or simply treating yourself to a showstopper dessert, this cake delivers restaurant-quality results with foolproof consistency. Every element is designed to impress, from the first bite to the last crumb.
The presentation matters just as much as the taste. We'll show you how to create that classic tiered look with clean edges, or keep it simple with a single layer dusted with cocoa powder for an elegant finish.
The key is confidence in your technique—once you master these steps, you'll understand why this recipe has earned its place among the best. Let's get started on creating your own blue ribbon winner.
Ingredients for blue ribbon chocolate cake
Twelve ingredients, twelve slices of blue ribbon perfection—moisture locked in every bite.
| Ingredient | Amount | Notes |
|---|---|---|
| Unsalted Butter 🧈 | 1 ½ cups | Room temperature, full-fat for richness |
| Granulated Sugar 🍚 | 2 ½ cups | Superfine preferred for smoother texture |
| Unsweetened Cocoa Powder 🍫 | ¾ cup | High-quality Dutch-processed preferred |
| All-Purpose Flour 🌾 | 2 ½ cups | Sifted, no substitutions |
| Buttermilk 🥛 | 1 ½ cups | Room temperature, full-fat |
| Vanilla Extract 🌿 | 2 tsp | Pure Madagascar bourbon preferred |
| Baking Soda 🧂 | 1 tsp | Freshly opened for best lift |
| Salt 🧂 | ½ tsp | Fine sea salt preferred |
| Hot Water 💧 | ½ cup | Just boiled, not scalding |
| Dark Chocolate Chips 🍫 | 1 ½ cups | 70% cacao minimum, semi-sweet |
| Powdered Sugar 🍚 | 4 cups | For buttercream, sifted |
| Heavy Whipping Cream 🥛 | 1 ½ cups | Cold, full-fat for stability |
| Vanilla Bean Paste 🌿 | 1 tbsp | Or 1 extra tsp vanilla extract |
| Cocoa Powder 🍫 | 2 tbsp | For dusting, same brand as recipe |
The cocoa powder is non-negotiable here. Hershey's Special Dark or Valrhona if you're splurging, but honestly, the store brand works too as long as it's Dutch-processed. The buttercream's secret? Cold cream and powdered sugar at room temp—whip it fast to avoid graininess. For the chocolate chips, Ghirardelli or Lindt are my go-tos, but any 70% cacao will do. The buttermilk needs to be room temperature (stick it in warm water for 10 minutes if it's cold), or you'll end up with dense cake. I always buy extra vanilla extract—this recipe uses it twice.
No buttermilk? Mix 1.5 tbsp lemon juice or vinegar with 1.5 cups milk and let sit for 5 minutes. Substituting cocoa powder? Natural unsweetened works at 1:1 ratio, but Dutch-processed gives that signature smoothness. Running low on powdered sugar? Sift granulated sugar in a blender for 30 seconds—it's not perfect, but it works in a pinch. The dark chocolate chips can be chopped bars if that's what you've got, but they won't melt as smoothly. And for the love of cake, don't skip the hot water—it activates the baking soda for that perfect rise.
This cake stays moist for 5 days if wrapped tightly in plastic and stored at room temperature. For longer storage, freeze slices wrapped individually—they'll taste like day one. The buttercream keeps 3 days in the fridge, so I usually make it fresh the day I serve. Pro tip: Brush the warm cake layers with simple syrup before adding frosting for extra moisture. And if you're entering a fair, bring extra powdered sugar for dusting—judges notice these details.
Why You'll Love This Recipe
- Three Bowls, One Cake: I swear by this method—just three mixing bowls, no stand mixer, and zero fuss. The buttermilk keeps it tender while the cocoa powder does all the heavy lifting for that real chocolate flavor, not the bitter stuff you sometimes get.
- Rich Without Guilt: That first bite? Pure, deep chocolate satisfaction. The sugar and butter create this perfect balance—sweet enough to make your taste buds dance, but the cocoa keeps it sophisticated. (Yes, even my picky husband doesn’t skip seconds.)
- Party-Proof Any Day: Between us, this cake is my go-to for birthdays, potlucks, or just because. It slices neatly, stays moist for days, and the buttermilk base means it won’t dry out if you’re feeding a crowd. Honestly, I’ve taken it to book clubs and holiday dinners—no one ever asks for the recipe, but they always ask for more.
- Budget Winner: Unsalted butter and basic flour? That’s my pantry staples. No fancy ingredients, no overpriced shortcuts—just pure, reliable chocolate cake that won’t break the bank. And the leftovers? They’re even better the next day, sliced thin with a sprinkle of powdered sugar.
Step-by-step instructions for award-winning chocolate cake
Here's how to bake a cake so moist it wins competitions every time.
Cream Butter and Sugar for Maximum Moisture
In a large mixing bowl, beat the 1.5 cups unsalted butter and 2.5 cups granulated sugar together on medium speed until light and fluffy—about 5-7 minutes. You'll know it's ready when the mixture nearly doubles in volume and leaves clean ribbons when the beaters are lifted. This step incorporates air, which creates that signature tender crumb.
I always use room-temperature butter here because cold butter creates pockets of fat that don't emulsify properly, leading to a denser cake. If your butter feels soft but leaves no indentation when pressed, it's perfect. Scrape down the sides of the bowl every minute or so to keep everything evenly mixed.
Combine Dry Ingredients and Buttermilk
In a separate bowl, whisk together the 2.5 cups all-purpose flour, 0.75 cup unsweetened cocoa powder, 1 tsp baking soda, and 0.5 tsp salt. Sift the dry ingredients first to prevent lumps—this is non-negotiable for a smooth batter. Then add the 1.5 cups buttermilk and 2 tsp vanilla extract to the butter mixture.
With the mixer on low speed, gradually add the dry ingredients to the wet mixture, mixing just until combined. The batter should be thick but pourable. Don't overmix—you should still see some flour streaks. This is where the magic happens: the buttermilk's acidity reacts with the baking soda to create lift while keeping the texture tender.
Fold in Hot Water and Chocolate Chips
Bring the 0.5 cup hot water to a boil, then let it cool for 1 minute until it's steaming but not scalding. Slowly pour it into the batter while mixing on low speed. This hot water activates the baking soda instantly, ensuring maximum rise. Then fold in the 1.5 cups dark chocolate chips by hand using a spatula—just until evenly distributed.
The hot water might seem counterintuitive, but it's the secret to that ultra-moist texture. It creates steam during baking that keeps the cake tender. If you skip this step, you'll end up with a cake that's good but not award-winning.
Bake to Perfect Doneness
Preheat your oven to 350°F and grease two 9-inch round cake pans thoroughly with butter or baking spray. Divide the batter evenly between the pans and smooth the tops. Bake for 30-35 minutes or until a toothpick inserted in the center comes out with just a few moist crumbs—no wet batter should cling to it.
I always tap the sides of the pans gently after 25 minutes to check for doneness. The cake should spring back slowly when pressed in the center. If the top starts browning too quickly, tent the pans with foil. Overbaking is the fastest way to ruin that perfect moist texture we're after.
Make the Chocolate Buttercream
While the cakes cool, beat the 1.5 cups heavy whipping cream to stiff peaks in a chilled bowl. In a separate bowl, whisk together the 4 cups powdered sugar, 1 tbsp vanilla bean paste, and 2 tbsp cocoa powder. Gradually fold the sugar mixture into the whipped cream until smooth and fluffy.
This buttercream needs to be thick but spreadable—like frosting on a birthday cake. If it's too thin, chill it for 10 minutes and beat again. The vanilla bean paste adds depth of flavor that regular extract can't match. Save a little extra to dust on top for that professional finish.
Pro Tips For Making Blue Ribbon Chocolate Cake
- Melt Butter Slowly: I learned this the hard way—dumping cold butter into hot sugar makes a greasy mess that won’t emulsify properly. Instead, melt the butter first (just until it softens, not fully liquid), then whisk it into the sugar while heating. This creates a smoother batter from the start, and your cake will have that signature velvety texture.
- Sift the Cocoa Twice: Unsweetened cocoa powder is notorious for clumping, and nothing ruins a chocolate cake faster than uneven distribution. Sift it once before measuring, then sift it again directly into your mixing bowl. This guarantees a rich, consistent color and flavor in every bite—no lumpy surprises.
- Don’t Overmix the Batter: The second you see streaks of flour in the batter, stop mixing. Chocolate cake thrives on a tender crumb, and overworking it introduces gluten that makes the texture dense and tough. Mix just until the flour disappears, then fold in the buttermilk gently. Your cake will stay moist and light, not like a brick.
- Use Room-Temp Buttermilk: Cold buttermilk curdles when mixed with warm butter and sugar, leading to a grainy batter. Let yours sit at room temperature for 30 minutes before using—it blends in smoothly and keeps the cake’s structure intact. (Yes, even if you’re impatient like me.)
Pro cooking tips for great blue ribbon chocolate cake
Reverse Creaming Magic
This recipe uses a technique called reverse creaming where you mix dry ingredients with butter first, then add liquids. This creates a tender crumb by preventing gluten development. Start by beating 1.5 cups butter and 2.5 cups flour together until crumbly—about 2 minutes—before adding any wet ingredients.
This step is what gives the cake its signature moisture that lasts for days. 💫
Hot Water Activation
The 0.5 cup hot water might seem unusual, but it's crucial for activating the baking soda instantly. Bring water to a boil, then cool it for 1 minute before mixing it into the batter.
This creates steam during baking that keeps the cake ultra-moist. Never skip this step—it's what separates good chocolate cake from award-winning cake.
Perfect Baking Temperature
Bake at 350°F for 30-35 minutes—this temperature ensures even cooking without overbrowning. Tap the sides of the pans gently after 25 minutes to check doneness. The cake should spring back slowly when pressed in the center.
If the top browns too quickly, tent with foil immediately to prevent burning while maintaining moisture.
Buttercream Tempering
For the buttercream, whip the 1.5 cups heavy cream to stiff peaks in a chilled bowl before adding the sugar mixture. This prevents graininess and creates a smooth, fluffy frosting.
If your buttercream is too thin, chill it for 10 minutes and beat again. The key is working with cold cream and room-temperature powdered sugar for that perfect consistency. ✨
Layering Like a Pro
Let the cakes cool in their pans for 10 minutes before transferring to a wire rack. This prevents cracking. Once completely cooled, level the tops if needed, then brush each layer with simple syrup (equal parts sugar and water, heated until dissolved).
This extra step adds moisture that keeps the cake tender for days. Spread the buttercream evenly between layers and on top.
Final Presentation Tips
For a competition-worthy finish, dust the top with 2 tbsp cocoa powder sifted through a fine mesh sieve. Use an offset spatula to create smooth sides. For extra flair, pipe chocolate ganache rosettes or add fresh berries.
The presentation matters just as much as the taste—judges notice these details when it comes to blue ribbon cakes. 🍫
Nutrition facts
Frequently asked questions
Why does this chocolate cake stay moist for days?
The secret lies in the reverse creaming method and hot water activation. Mixing butter with flour first creates a tender crumb, while the hot water generates steam during baking that locks in moisture. The buttercream also acts as a protective barrier, keeping slices fresh even after slicing.
Can I substitute buttermilk in this recipe?
Yes! Mix 1.5 tbsp lemon juice or vinegar with 1.5 cups milk and let sit for 5 minutes to create a buttermilk substitute. For best results, use room-temperature milk. This maintains the cake's signature tender texture by keeping the acidity that reacts with baking soda.
How do I prevent my cake from cracking?
Let the cakes cool in their pans for 10 minutes before transferring to a wire rack. This gradual cooling prevents sudden temperature shifts that cause cracks. Also, avoid opening the oven door too early—keep the temperature stable at 350°F until the toothpick test confirms doneness.
What's the best way to store leftover cake?
Wrap tightly in plastic wrap and store at room temperature for 5 days. For longer storage, freeze slices individually wrapped—they'll taste fresh when thawed. The buttercream keeps 3 days refrigerated, so make it fresh before serving for best texture.
Can I make this cake in a different pan size?
For a single layer, use a 9-inch round pan (same batter quantity). For a 10-inch pan, reduce baking time by 5-7 minutes—check with a toothpick at 25 minutes. Never overfill pans more than 2/3 full or the cake may overflow. Adjust buttercream quantity accordingly.