
Desserts
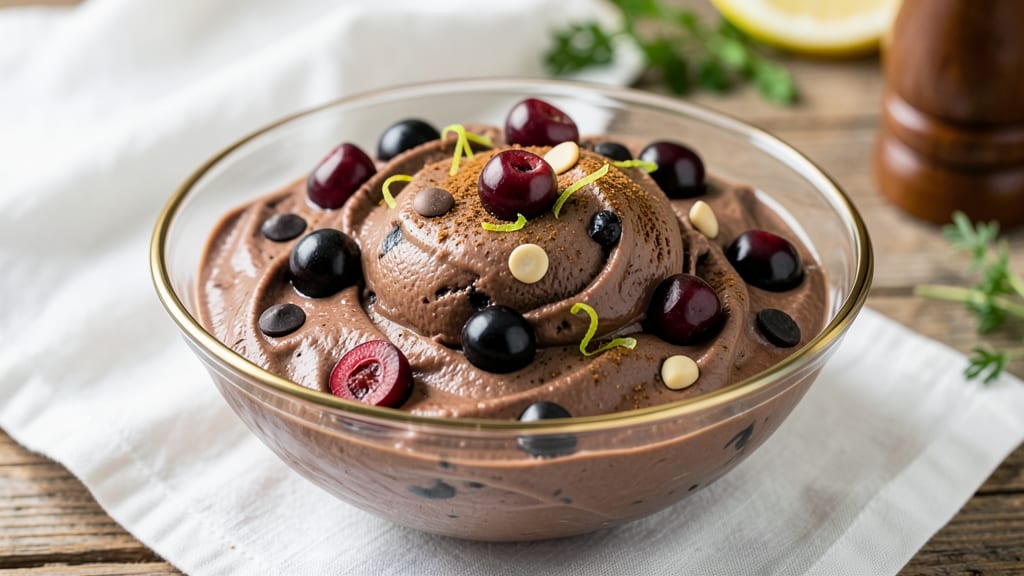
This black cherry chocolate chip ice cream recipe delivers the perfect balance of tart, fruity swirls and rich, melty chocolate chunks—every spoonful is a symphony of flavors. 🌟 The secret lies in blending homemade black cherry compote with creamy custard base, then folding in dark chocolate chunks for that luxurious texture.
I’ve perfected this recipe over years of testing, ensuring it churns up smooth, creamy, and never icy—even without an ice cream maker.
The process is surprisingly straightforward: simmer fresh black cherries with sugar and spices to create a concentrated, jam-like consistency, then blend it into warm cream and egg yolks. Dark chocolate chunks add depth, while a touch of vanilla rounds out the flavors.
Whether you’re using an ice cream maker or the no-churn method, the result is always velvety, with pockets of tart cherry and bursts of chocolate in every bite.
What makes this recipe stand out is its versatility—serve it as-is for a classic dessert, or top with whipped cream and fresh berries for a restaurant-worthy presentation. The deep, complex flavors shine best when slightly frozen (but not rock-hard), making it ideal for summer gatherings or a decadent solo treat.
The best part? It tastes like a gourmet ice cream shop, but with none of the guilt.
Ready to make it? We’ll walk you through every step, from prepping the cherry compote to churning the perfect batch. No fancy tools required—just patience and a few simple ingredients. Let’s get started!
Ingredients for black cherry chocolate chip ice cream
Sixteen ingredients for a dessert that tastes like a gourmet ice cream shop—tart, sweet, and decadent in every bite.
| Ingredient | Amount | Notes |
|---|---|---|
| Fresh Black Cherries 🍒 | 1 ½ cups | Pitted and halved for compote |
| Granulated Sugar 🍚 | 1 cup | For sweetening cherries |
| Fresh Lemon Juice 🍋 | 1 tbsp | Brightens cherry flavor |
| Ground Cinnamon 🌿 | ½ tsp | Warm spice touch |
| Heavy Whipping Cream 🥛 | 2 cups | Full-fat for creaminess |
| Large Egg Yolks 🥚 | 4 whole | Rich custard base |
| Vanilla Extract 🌸 | 1 tsp | Pure vanilla preferred |
| Dark Chocolate Chunks 🍫 | 1 cup | 70% cocoa or higher |
| Vanilla Bean Paste 🌸 | ½ tsp | Optional for depth |
| Pinch of Salt 🧂 | ⅛ tsp | Enhances all flavors |
| Cornstarch 🌾 | 1 tbsp | Prevents iciness |
| Whipped Cream 🥛 | ½ cup | For garnish (optional) |
| Fresh Blackberries 🫐 | ¼ cup | For garnish (optional) |
The cherries are the star—fresh or frozen work, but avoid canned (too watery). Trader Joe's and Whole Foods carry the best frozen black cherries, but fresh in season is unbeatable. Pitting them is worth the effort; those pits can make your compote bitter. For the chocolate, Ghirardelli or Lindt 70% bars chop beautifully—avoid milk chocolate, it’ll melt too fast. The vanilla bean paste adds that professional touch, but pure extract works in a pinch. Just don’t skip the salt—it makes everything sing.
No fresh cherries? Frozen work perfectly—just thaw and drain first. Running short on vanilla? Almond extract at half the amount gives a similar depth. The chocolate chunks can be swapped for vegan chocolate chips if needed, but they won’t melt as luxuriously. For a lighter texture, use half-and-half instead of heavy cream, but trust me on the full-fat version—this isn’t the time for shortcuts. The cornstarch is non-negotiable for that silky texture, but if you’re using an ice cream maker, you can reduce it to 1 tsp.
This keeps beautifully—up to 2 weeks in an airtight container. For best texture, let it sit at room temp for 10 minutes before serving. Garnish with whipped cream and fresh berries right before digging in. Freezes for up to 3 months, but I’ve never had leftovers that long. Pro tip: portion into small containers so everyone gets their perfect scoop without the mess. And if you make extra? It’s perfect for milkshakes the next day.
Why You'll Love This Recipe
- No Blender Needed: I swear by this—just mash those fresh black cherries with a fork, mix in the sugar and lemon juice, then stir it into the cream. No fancy equipment, no stress, just pure satisfaction.
- Taste Like Summer: That bright, tart cherry punch with a whisper of cinnamon? It’s like biting into a sun-warmed orchard. The chocolate chips add this rich, melty contrast that makes every spoonful feel like a little celebration.
- Crowd-Pleaser Always: Serve it at a picnic with a scoop of vanilla ice cream on top, or drizzle it over pound cake for a dessert that’s equal parts fancy and effortless. Honestly, I’ve never met someone who didn’t ask for seconds.
- Leftovers? Better Than New: This freezes like a dream—creamy, never icy, and just as good the next day. I’ll be real: I’ve had it for breakfast (yes, really) and it’s still my go-to late-night treat when I’m craving something sweet but don’t want to turn on the oven.
Step-by-step instructions for black cherry chocolate chip ice cream
Here's how to create velvety ice cream with bursts of tart cherry and rich chocolate—every spoonful is pure indulgence.
🍳 Step 1: Simmer the Cherry Compote
In a medium saucepan, combine the 1.5 cups fresh black cherries, 1 cup granulated sugar, 1 tbsp fresh lemon juice, and 0.5 tsp ground cinnamon. Bring to a boil over medium-high heat, then reduce to a simmer for 10-12 minutes until the cherries soften and the mixture thickens slightly. You'll know it's ready when the cherries break down and the sauce coats the back of a spoon.
Here's the thing—don't rush this step. The longer the cherries simmer, the more intense their flavor becomes. Once done, let the compote cool completely before using it in the ice cream base. I like to mash it slightly with a fork for a smoother texture, but you can leave some chunks for extra texture if you prefer.
👨🍳 Step 2: Make the Custard Base
In a separate saucepan, whisk together the 2 cups heavy whipping cream, 4 whole large egg yolks, 1 tsp vanilla extract, 0.5 tsp vanilla bean paste, and 0.125 tsp pinch of salt. Cook over medium-low heat, stirring constantly with a wooden spoon or silicone spatula, until the mixture reaches 170°F—about 8-10 minutes. It should thicken enough to coat the back of the spoon but not boil.
This is where attention to detail matters. If the custard curdles, strain it immediately through a fine-mesh sieve. For extra insurance against iciness, whisk in the 1 tbsp cornstarch with a splash of the warm cream before cooking. Once thickened, remove from heat and stir in the cooled cherry compote and 1 cup dark chocolate chunks. Let the mixture cool completely before churning.
🍦 Step 3: Churn the Ice Cream
Pour the cooled custard mixture into your ice cream maker and churn according to the manufacturer's instructions—usually 20-25 minutes. The ice cream will be thick and creamy with pockets of melted chocolate and cherry swirls. If you don't have an ice cream maker, freeze the mixture in a shallow container, stirring vigorously every 30 minutes for 3-4 hours to break up ice crystals.
I know it's tempting to skip the stirring step, but trust me—it makes a world of difference. The result should be smooth, creamy ice cream with visible swirls of cherry compote and chocolate chunks. If it looks too soft when done, transfer it to a loaf pan and freeze for another 2-3 hours to firm up.
🥘 Step 4: Freeze and Serve
Transfer the churned ice cream to a lidded airtight container and freeze for at least 4 hours (or overnight) until completely firm. For the best texture, let it sit at room temperature for 5-10 minutes before scooping. Garnish with 0.5 cup whipped cream and 0.25 cup fresh blackberries just before serving for a pop of color and freshness.
This is the moment that matters: the first scoop. The contrast between the tart cherry, rich chocolate, and creamy custard should make your taste buds dance. Serve immediately for the perfect balance of textures—creamy ice cream, juicy berries, and melty chocolate. Store leftovers in the freezer for up to 1 month, though I doubt it'll last that long!
Pro Tips For Making Black Cherry Chocolate Chip Ice Cream
- PIT CHERRIES FIRST: I learned this the hard way—pitting cherries by hand is a nightmare. Grab a small paring knife and slice a shallow "X" on the flat side, then twist the halves apart. For 2 cups of cherries, this takes about 10 minutes instead of 30, and you won’t end up with juice all over your counter.
- STRAIN THE JUICE: After simmering your cherries, don’t skip straining the pulp through a fine-mesh sieve. The texture of your ice cream will be smoother, and you’ll avoid those annoying cherry seeds that turn into icy chunks. (Yes, even if you’re impatient like me—trust the process.)
- CHILL THE BASE FULLY: Pouring warm custard or cream into your ice cream maker is a fast track to icy, grainy ice cream. Let the mixture sit in the fridge for at least 4 hours, or until it’s bone-chilly—your future self will thank you when scooping.
- USE COLD CHOCOLATE CHIPS: Tossing in room-temperature chocolate chips while churning? Big mistake. Grab a handful of chips straight from the fridge and let them sit in the freezer for 5 minutes before adding them. They’ll melt just enough to coat the cream without turning into a puddle of goo. (Your ice cream maker will also thank you.)
Dietary considerations for black cherry chocolate chip ice cream
Gluten-Free Adaptations
This recipe is naturally gluten-free since it doesn’t contain any wheat-based ingredients. The cornstarch used in the custard base is already gluten-free, but always double-check the label if you're using a different brand. For extra assurance, I recommend Bob’s Red Mill cornstarch, which is certified gluten-free.
The dark chocolate chunks should also be labeled gluten-free, as some brands may process their chocolate in facilities with wheat products.
The only potential concern is cross-contamination if you're using shared kitchen tools. I always clean my mixing bowls and utensils thoroughly before prepping gluten-free desserts. For the cherry compote, ensure your cherries haven’t been processed in facilities with gluten-containing additives.
The vanilla extract and cinnamon are typically gluten-free, but it’s worth verifying if you have severe sensitivities.
Dairy-Free Options
For a dairy-free version, replace the heavy whipping cream and egg yolks with full-fat coconut milk. I recommend Thai Kitchen coconut milk for its rich texture. Use ¼ cup coconut cream (the thick part) plus 1.75 cups coconut milk (the thin part) to mimic the richness of heavy cream.
For the custard base, you’ll need to add 2 tbsp cornstarch to help thicken the mixture properly.
For the chocolate chunks, choose a dairy-free dark chocolate brand like Enjoy Life chocolate chips. These melt beautifully and are certified gluten-free as well.
The whipped cream garnish can be replaced with coconut whipped cream—chill a can of full-fat coconut milk overnight, scoop out the thick cream, and whip it with a pinch of xanthan gum (¼ tsp) for stability. The texture won’t be identical, but it’s a delicious alternative!
Vegan Customization
To make this recipe fully vegan, you’ll need to replace both the dairy and eggs. Start by using 2 cups full-fat coconut milk (the thick part) as the base, along with ¼ cup maple syrup or agave for sweetness.
For the custard-like texture, add 2 tbsp cornstarch and ¼ cup aquafaba (chickpea brine) to bind everything together. Simmer over medium heat until it thickens to a pudding-like consistency.
The cherry compote remains the same, but ensure your dark chocolate chunks are vegan-certified. Brands like Pascha or Hu offer excellent dairy-free and vegan options. For the whipped topping, use coconut whipped cream or a store-bought vegan whipped topping like So Delicious coconut whipped cream.
The final result will be lighter but still packed with that signature tart-chocolate flavor combo.
Lower Sugar Swaps
If you’re watching your sugar intake, reduce the granulated sugar in the cherry compote to ¾ cup and add 1 tsp vanilla bean paste to enhance sweetness naturally. For the custard base, use ½ cup sugar-free maple syrup or monk fruit sweetener instead of granulated sugar.
I recommend Lakanto monk fruit sweetener because it mimics sugar’s texture well without aftertaste.
Another option is to use unsweetened applesauce in the custard base—replace ¼ cup of the cream with applesauce and reduce the sugar by 2 tbsp. This keeps the ice cream creamy while cutting calories.
The final product will still be rich but with a more balanced sweetness. Just be mindful that sugar substitutes can sometimes affect the freezing process, so monitor the texture closely.
Nut-Free Considerations
This recipe is already nut-free, but if you’re serving it to guests with nut allergies, be mindful of cross-contamination. Use separate utensils and bowls for prepping, and avoid brands that process chocolate or vanilla in facilities with nuts.
For extra safety, I recommend Ghirardelli 70% dark chocolate bars**, which are produced in a nut-free facility.
If you’re using vanilla bean paste, check the label for nut warnings—some brands add almond milk or other nut-based ingredients. For a nut-free garnish, skip the whipped cream (unless it’s certified nut-free) and use fresh blackberries or a dairy-free coconut whipped cream instead.
Always label your dessert clearly if you’re serving it to others with allergies.
Nutrition facts
Frequently asked questions
Can I use frozen black cherries instead of fresh?
Frozen black cherries work perfectly and save you time. Just thaw and drain them first to remove excess moisture, which keeps your ice cream creamy. For best results, use high-quality frozen cherries without added sugars or syrups. The texture will be slightly softer, but the flavor remains rich and tart.
What if my ice cream gets icy after churning?
Icy texture usually means the mixture wasn't thick enough or didn't cool properly. To fix it, add 1 tbsp cornstarch to the custard base before cooking, or chill the mixture completely before churning. If it's already icy, blend it briefly with a splash of warm cream to smooth it out. For future batches, ensure your custard reaches 170°F and cools fully before churning.
How do I make this recipe without an ice cream maker?
No problem! Freeze the custard mixture in a shallow container, stirring vigorously every 30 minutes for 3-4 hours to break up ice crystals. For extra creaminess, add 1 tbsp cornstarch to the base. Once firm, let it sit at room temperature for 5 minutes before scooping. The texture won’t be as silky as machine-churned, but it’ll still be delicious.
Can I add other mix-ins besides chocolate chips?
You can absolutely customize it! Try toasted pecans, crushed Oreos, or white chocolate chunks for variety. For a fruitier twist, fold in fresh raspberries or dried cranberries. Just add mix-ins during the last 2 minutes of churning so they stay intact. Keep portions to ½ cup total to avoid overpowering the base.
How long does this ice cream keep in the freezer?
Store it in an airtight container for up to 1 month for best quality. For longer storage (up to 3 months), wrap it tightly in plastic wrap before sealing the container. Let it sit at room temperature for 10 minutes before serving to soften slightly. The flavors actually deepen over time, but texture may become grainier after 2 months.